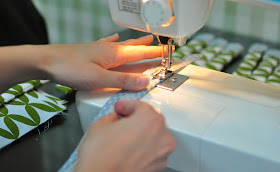
Yesterday afternoon, I got the bright idea to make fabric chopstick holders for the wedding! We're having a great company called El Kimchi cater the wedding... Korean Tacos! We couldn't get married without having some sort of Korean influence. We've spent our entire relationship in the country! Granted, Korean tacos don't necessarily require chopsticks, but we're used to having them at EVERY MEAL in Korea, and we're ready to watch our American friends fumble with them like we once did!
So, with said, I thought,
Why not make something beautiful for them to sit in before the comedy ensues! :)
I used left over fabric from two of the patterns I used for the wedding invitations and that will also be used to decorate the wedding! Here's the final product, pre-ironed, FYI!
I can't imagine many people would need to know how to make these, but for any of you planning an Asia dinner, I'd encourage you to get your sewing machine out and make some pretty chopstick holders for your table setting!
First, I cut about an 8 inch by 3 inch piece of fabric.
Then, I folded it over and sewed three sides, leaving a small one open for the chopsticks to get in!
The next step is REALLY time consuming! It's the part where you have to turn that fabric right side in, which basically means you'll have to push and pull the fabric for a good 5 minutes! If you happen to have a guy around who wants to help while he watches basketball, take full advantage! :) If you happen to have a chopstick to push the fabric through, it seems to help do the trick, too.
Next up was the top of the chopsticks holder! One single fabric looks good... but two different fabrics looks BETTER in my opinion! :) Cut a long piece of fabric about 2 inches in width and turn either side up and sew along the edge.
Then cut it about 3 inches in length.
Now it's time to put the two fabrics together. People who "do things right" or sew all the time would probably say this was a no-no, but I happen to think Elmer's glue works just fine and it's FAST!
Besides, it's my design, so I can say how to make it, right?! lol
I overlapped the blue fabric to hide the unfinished green fabric. It's a fun trick!
That's the final step! You're finished!
Well, that is, unless you're making them for a wedding and have to repeat, repeat, repeat 62 times! In my opinion, it was worth the mess, tired hands, and hours of sewing, cutting and gluing! Hope our wedding guests agree!
*** I'd probably get in trouble if I didn't mention that Aaron helped sew some of the green fabric! I'll probably get in more trouble after I tell you that he told me he really likes sewing! ahahah! Such a sweetheart!


